This year I decided to make some decorated Easter eggs. Quite uncharacteristically I started working on them several weeks before Easter (I'm very prone to working on craft projects last minute, so this was a definite achievement on my part).
I've had a book on decorating Easter eggs using beads that I brought with me from Russia for a while but I didn't have the motivation to do anything from it till this March. The book is in Russian and is called "Easter Eggs from Beads". If you are curious, you can see how the book looks here. I stopped by Joan's and picked up some small wooden eggs to decorate. My first egg used the "belt" technique from the book. You start by making a strip from beads that features the main design. Once the strip is done, you close it to make it into a "belt" (or a very wide bracelet with small circumference). This "belt" is then placed on the egg and you just need to cover the top and the bottom of the egg in beads using your imagination. This technique uses a needle and a thread to weave the beads. Here is the result:
[caption id="" align="aligncenter" width="512" caption="Easter egg in
the "belt" technique."][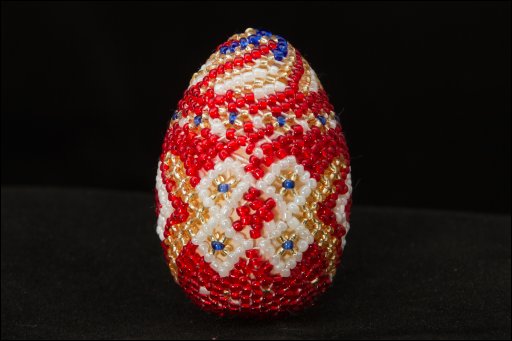 ][][/caption]
Next I decided to try to create to crochet a beaded egg. A long time ago my sister (who is quite skilled in beadwork and has been teaching classes to kids on how to do cool things with beads for more than 10 years) taught me how to crochet with beads. The idea is quite simple. You start by putting the beads on the thread that you're going to crochet with. You then proceed to crochet with the thread making single crochets as you go and using one bead per crochet. Beads will show up on one side of the canvas while on the back it will look just as a crocheted cloth looks like. If you crochet in one direction (in a spiral, for instance, like I did for the egg) it's not much different from crocheting just with a thread. If you're crocheting in a pattern that requires a change of direction (for example, if you are crocheting a rectangle) it's a little tricky at first to go in one direction vs. the other. I honestly don't remember how to do it anymore (although I could probably figure it out if I need to) but luckily I only needed to crochet in a spiral for the egg project so it was pretty straightforward and didn't take long to pick up even though I haven't done crocheting with beads in years.
[caption id="" align="alignright" width="234" caption="My sister
crocheted this picture which is now hanging in our house
"] [/caption]
In this technique you can make crocheted pictures which can be an alternative to embroidering pictures with beads. When you embroider a picture with beads, you place a bead on a tread one at a time and then attach it to a canvas one bead at a time with a needle. There are people who make big Russian Orthodox icons in this technique. You can even buy kits for making such icons. In the crocheting with beads technique you don't need a canvas - you are creating one as you crochet. Here is an example of a picture you can do using this technique - done by my sister.
In principle, you can make an crocheted egg that has a pattern. However, this would require careful calculation to figure out exactly how many beads of which color in which order you need to put on a thread to end up with a particular design once you crochet around the egg. Despite the fact that I started working on the eggs a few weeks before Easter I still didn't have enough time to spend figuring out the pattern for a crocheted egg. Instead, I picked up variegated beads which ended up creating a random pattern on the egg. The result was quite nice, and I don't regret not spending hours trying to figure out a pattern for the egg. As far as the technique goes, I started with making a "bowl" for the bottom of the egg that went about 2/3 of the way up. After that I would have to decrease the number of stitches in a row so the circumference of the "bowl"'s opening would start to decrease. This meant that my "bowl" would no longer fit the egg (I was crocheting the "bowl" and then would fit it on the egg periodically to make sure that I was doing the right thing). I therefore needed to make a "hat" to go on the top of the egg. Finally, I assembled it all by placing the "bowl" and the "hat" on the egg and sewing the two together. I then put beads on the seam to cover it. Because of the randomness of the bead color and the absence of the pattern the seam is completely invisible.
[caption id="" align="aligncenter" width="512" caption="Crocheted beaded
egg"][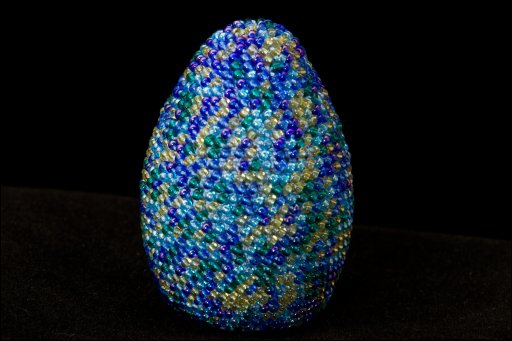 ][][/caption]
For the third egg I used a slightly bigger wooden base I got at Michael's which was painted white. A long time ago I have seen examples of crocheted Easter eggs in a newspaper for crocheting that was published in my home town back when I was in school. The newspaper was called "Tatiana" and I owe my devotion to crocheting to it. It was in fact a very interesting newspaper as it was published by a lady who was an engineer (in the same research institute as my dad) who loved crochet. Unfortunately, it doesn't look like there are any scans of this newspaper online (it was printed from 1992 to 2000), but I did find an article about it and about its creator Tatiana Chadaeva from 1998. I made countless collars and doilies from this newspaper when I was 13-17.
Since I didn't really have a pattern to go off with for the crocheted egg, I just made one up as I went. I think the result was pretty decent. This egg was the fastest to make.
[caption id="" align="aligncenter" width="512" caption="Crocheted lace
egg."][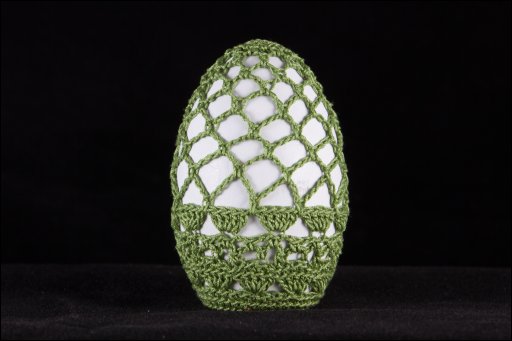 ][][/caption]
The last egg I made had a plastic egg base. A couple of weeks before Easter, Erik and I went to a Yuri's Night celebration at a local restaurant. There we picked up some schwag that came in a clear plastic egg. The schwag, by the way, was a key chain that makes Darth Vader breathing noise when pressed :). Since nothing in my house can be thrown out without first considered for re-purposing, I couldn't just get rid of the plastic egg. So, I decided to make it into a flower bed. I was waiting to use my book on crocheted flowers for far too long. First I made the background that featured the grass and the sky. Then I made individual flowers and the greenery using the book and sewed them onto the egg. This is the egg I finished after Easter so I only have a picture of it with one flower that was done by the time the picture was taken. The egg is now complete and has 4 flowers.
[caption id="" align="aligncenter" width="512" caption=""Flower bed"
crocheted egg."][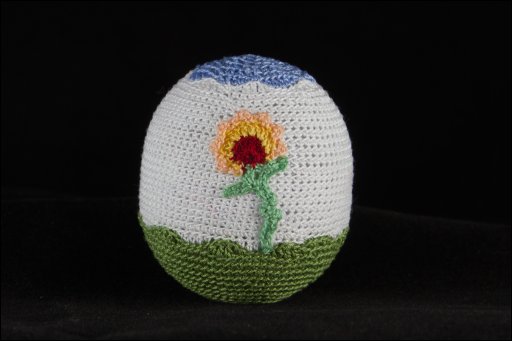 ][][/caption]
This concludes my Easter eggs exhibit. I shall see if I decide to continue this next year. I'm happy that I got to try different techniques and the process was definitely not boring due to that.
Special thanks goes to my amazing father-in-law John who made all the pictures of the eggs in this post. He spent hours taking these photos using the light box and I think the resulting pictures really do my eggs justice. :)
[caption id="" align="aligncenter" width="499" caption="Three of the
eggs together"][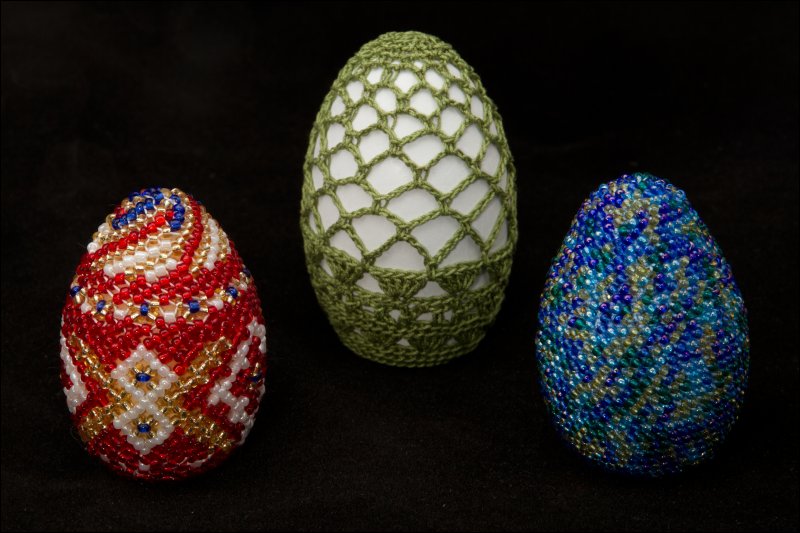 ][][/caption]
[]: http://nygren.org/gallery/index.cgi?mode=image&album=/Ksusha/crafts/2011-eggs&image=02-IMG_1372%20Eggs%20via%20flash.jpg
[]: http://nygren.org/gallery/index.cgi?mode=image&album=/Ksusha/crafts/2011-eggs&image=05-IMG_1375%20Eggs%20via%20flash.jpg
[]: http://nygren.org/gallery/index.cgi?mode=image&album=/Ksusha/crafts/2011-eggs&image=09-IMG_1481%20Eggs%20via%20tripod.jpg
[]: http://nygren.org/gallery/index.cgi?mode=image&album=/Ksusha/crafts/2011-eggs&image=10-IMG_1491%20Eggs%20via%20tripod.jpg
[]: http://nygren.org/gallery/index.cgi?mode=image&album=%2FKsusha%2Fcrafts%2F2011-eggs&image=01-IMG_1359+Eggs+via+flash.jpg&maxDimension=800